
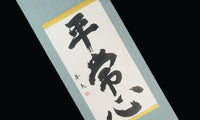
Taking Care of your Kakejiku
ed: This article was originally published on Fuh-Mi's former website (a Japanese calligrapher who mainly works in the field of contemporary art and who offers many works on our website).
Congratulations! You’ve made a beautiful investment for your martial art school or for your home interior. Please relax and enjoy your new calligraphy for a while; then come back here to learn how to keep your artwork looking great for a long time.
Japanese calligraphies and hanging scrolls are designed to last. Hundreds of years. Your kakejiku will be a lasting masterpiece with minimal maintenance. Here's all you need to know about looking after your new artwork.
Kakejiku and calligraphies are delicate works of art
Japanese calligraphies and kakejiku, like any other work of art, are vulnerable to UV. Avoid displaying in direct sunlight. Under persistent direct exposure, the colours of the fabric and the calligraphy will fade.
Hanging scrolls are created using high-quality but delicate washi and textiles glued together. As a result, they are particularly sensitive to strong moisture and extreme dryness.
There are a few things to bear in mind if you want to keep your kakejiku in good shape:
- Do not hang in a room with excessive air conditioning or in a humid environment.
- If you can, store the kakejiku in a Kiri box in a cool, dry location.
- In order to eradicate insects and fungi, kakejiku were traditionally dried twice a year, in the spring and fall, on a bright sunny day. They were hung outside, but NOT in direct sunlight, in order to allow them to breathe. We understand that it may not be easy to do so anymore, but if you have the opportunity to do mushi-boshi (虫干し - "bug dry"), we definitely recommend you to do so.
- It's a good idea to roll the kakejiku up once in a while and let it rest in a Kiri box for a short period of time.
- Always manipulate with care.
- When rolling a kakejiku up, be careful not to wind it too tightly. Wrap the top lace (kake-himo) loosely around it to tie it.

Women doing mushi-boshi for their kimonos - By Utagawa Kunisada, 1854.
How to tie a kakejiku

First, roll the scroll all the way up.

Then, insert the maki-gami between the final two layers.

The maki-gami goes under the kake-himo (top lateral lace).

Wrap the maki-gami around the kakejiku.

The maki-gami goes under the kake-himo again.

Now, take the maki-o (long vertical lace) and place it slightly to the left of the maki-gami.


Wrap the maki-o around the kakejiku three times, going over the lateral lace each time.

Make a "V" with the tip of the lace.


This time the maki-o goes under the lateral lace.

Then under again, on the other side.

You did it! Otsukare-sama deshita!
Now you can safely store the kakejiku in a Kiri box. When you want to display the scroll again, simply pull the tip of the maki-o and the entire lace will untie.
Remember to unroll the scroll slowly and handle it with care.

0 comments - Taking Care of your Kakejiku